Have you ever encountered the backupelement.exe error on your computer? In this article, we will explore what this error is and share some simple steps to fix it.
Overview of Backup Element
The Backup Element is a software application developed by SoftwareElements that provides users with a means of backing up and restoring their data files and documents. Backupelement.exe is the installer name for this program. It is available for download on the developer’s website as a trial version, and users can purchase the full version to access all its features. Backup Element tracks changes in a user’s system and creates a backup of their files automatically. It can also back up Outlook Express, Password Agent, and other data files. Backup Element is useful for both home networks and enterprises. The program is part of the System Utilities category and is compatible with Windows PCs. Other data protection software that can be used alongside Backup Element includes Efficient Elements, InSync, SOS Online Backup, and more. If users encounter any issues with the program, they can check for updates or contact the developer for assistance.
Understanding the Recovery Services Object Hierarchy
The Recovery Services Object Hierarchy is a crucial aspect of the backup and restore process. Understanding this hierarchy can help you better manage your data and ensure that your files are protected.
At the top of the hierarchy is the Backup Element, which is responsible for managing all backup and restore operations. Backupelement.exe is the installer name for SoftwareElements’ Backup Element product.
The Backup Element contains a number of different objects, including Backup Sets, Backup Jobs, and Recovery Points. These objects are used to track and manage the backup and restore process.
When you download the trial version of Backup Element from the SoftwareElements website, you’ll be able to access the Recovery Services Object Hierarchy and begin setting up your backup and restore procedures.
Whether you’re an individual user with a single PC or an enterprise with multiple computers and home networks, understanding the Recovery Services Object Hierarchy is essential for efficient and effective data protection.
Setting Up and Registering for Backup Services
Setting up and registering for backup services is a critical step in protecting your data from loss or damage.
To get started, choose a backup software that fits your needs, such as Backup & Restore, InSync, or SOS Online Backup.
Download the setup package from a reliable source and follow the instructions to install the software on your PC or Mac.
Once the software is installed, you’ll need to create an account and set up your backup preferences.
Specify which files, folders, and data files you want to back up, and set up a schedule for automatic backups.
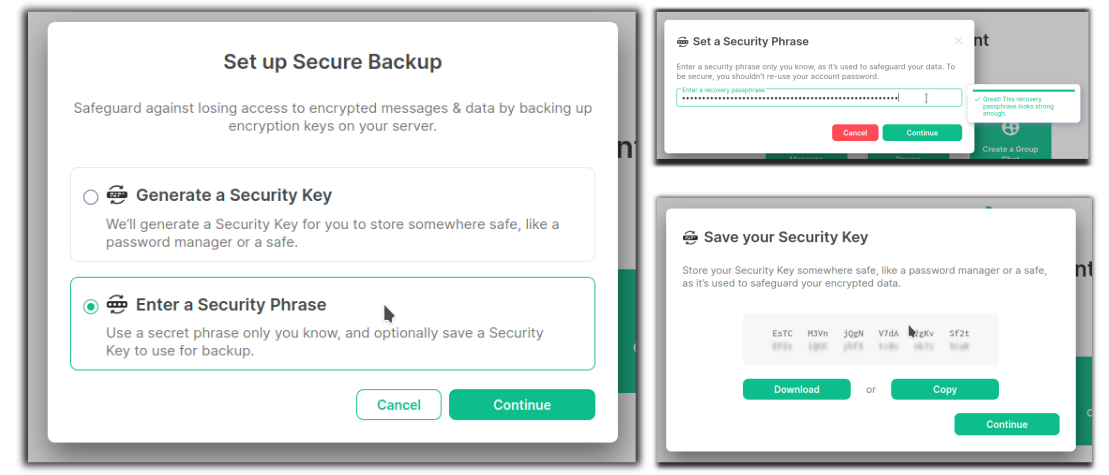
You may also want to set up password protection for your backups.
If you have specific applications that you want to back up, such as Outlook Express or Password Agent, check if your backup software supports them.
Efficient Elements and Automation System Utilities are other great backup options.
Don’t wait for an excuse to lose your important documents and presentations, take control of your data with reliable backup services.
Creating and Viewing Recovery Services Vaults
| Creating and Viewing Recovery Services Vaults | |
|---|---|
| Step | Description |
| 1 | Open the Azure portal and sign in with your credentials |
| 2 | Select “All Services” from the left-hand menu and search for “Recovery Services Vaults” |
| 3 | Click on “Add” to create a new Recovery Services Vault |
| 4 | Enter a name and select the desired subscription, resource group, and location |
| 5 | Choose the backup goal and workload type, and then click “Review + create” |
| 6 | Review the details and click “Create” to create the vault |
| 7 | To view an existing Recovery Services Vault, navigate to “Recovery Services Vaults” in the Azure portal and click on the desired vault |
Backing Up Azure VMs with Backup Element
Backing up Azure VMs with Backup Element is a straightforward process. First, download the Backup Element setup package from the softwareelements product website. Once downloaded, run the setup package and follow the instructions to install Backup Element on your computer.
To back up your Azure VMs, open Backup Element and click “Backup & Restore” on the left-hand side. Click “Add Backup” and select the VM you want to back up. Choose the location where you want to store the backup file and set a password for added security. Click “OK” to save the backup job.
Backup Element also offers automation options, allowing you to schedule regular backups of your Azure VMs. This feature is especially useful for enterprises with multiple VMs to back up.
Modifying Storage Replication and Protection Policies
- Understand the current storage replication and protection policies
- Analyze the impact of modifying these policies

- Identify the specific changes that need to be made
- Review the available options for modifying storage replication and protection policies
- Consult with relevant stakeholders and experts before making any changes
- Implement the desired modifications carefully and systematically
- Test the changes thoroughly to ensure they are working as intended
- Monitor the modified policies on an ongoing basis to ensure they continue to meet your needs
Monitoring and Managing Backup Jobs with Backup Element
| Backup Element Features | Description |
|---|---|
| Real-time monitoring | Backup Element provides real-time monitoring of all backup jobs running on the system. This allows administrators to quickly identify and resolve any issues that may arise. |
| Centralized management | Backup Element enables centralized management of all backup jobs across the network. This makes it easy for administrators to manage backups for multiple systems from a single interface. |
| Automated reporting | Backup Element provides automated reporting of backup job status, including success and failure rates. This data can be used to identify trends and improve backup processes. |
| Flexible scheduling | Backup Element allows administrators to create flexible backup schedules, including full and incremental backups, and custom schedules based on specific needs. |
| Easy recovery | Backup Element simplifies the recovery process, allowing administrators to quickly restore files and folders to their original locations with just a few clicks. |
Restoring Azure VMs and Selective Disks
Restoring Files from an Azure VM Backup
Restoring files from an Azure VM backup can be a quick and easy process. First, navigate to the Azure portal and select the VM you want to restore from. Then, select “Backup” from the menu and choose the backup you want to restore from. Download the backup files to your local machine.
Next, extract the files using a software like 7-Zip. Locate the files you want to restore and copy them to their original location on your hard drive. If prompted, enter your password to access the files.
It’s important to note that restoring files from an Azure VM backup is not a substitute for tracking changes or updating your files regularly. To prevent data loss, it’s recommended that you back up your files regularly and use secure passwords.
Next Steps for Using Backup Element Effectively
- Update Backup Element:
- Go to the official website of Backup Element.
- Download and install the latest version of Backup Element.
- Restart your computer after installation.
- Check for Virus Infection:
- Run a full virus scan on your computer.
- If any virus is detected, remove them immediately.
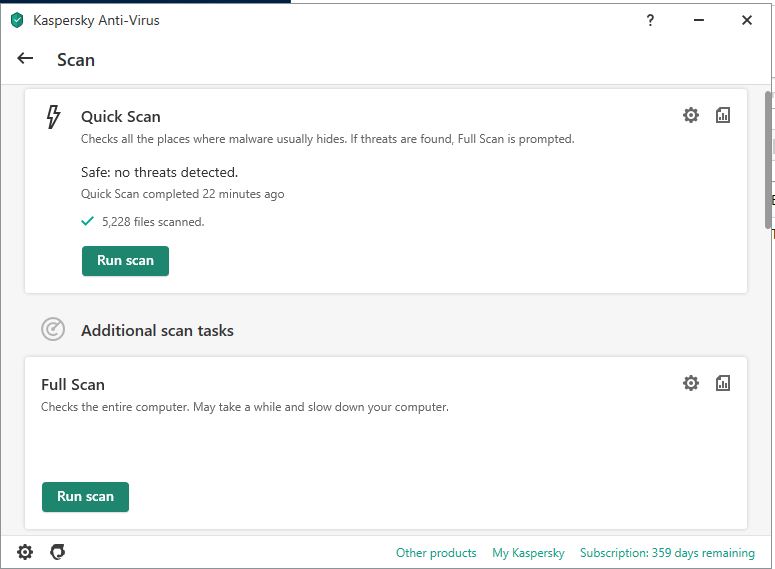
- Restart your computer after removal.
- Repair Corrupted Files:
- Open Command Prompt as an administrator.
- Type “sfc /scannow” and press Enter.
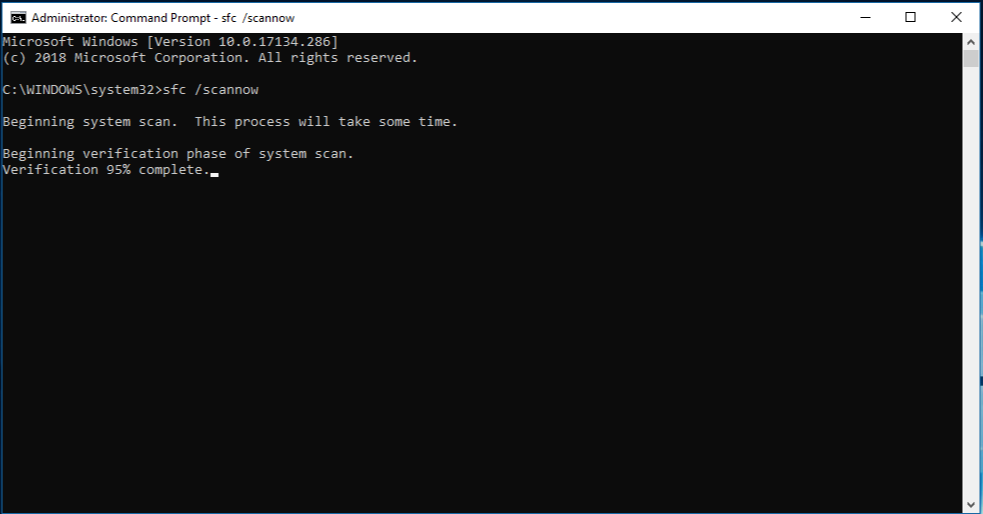
- Wait for the process to complete.
- If any corrupt file is found, it will be automatically repaired.
- Restart your computer after repair.
- Uninstall and Reinstall Backup Element:
- Press Windows key + R to open the Run dialog box.
- Type “appwiz.cpl” and press Enter.
- Find Backup Element in the list of installed programs.
- Right-click on it and select Uninstall.
- Follow the instructions on the screen to complete the uninstallation process.
- Download and install the latest version of Backup Element.
- Restart your computer after installation.
- Check for System Updates:
- Click on the Start menu and select Settings.
- Click on Update & Security.

- Click on Check for updates.
- If any update is available, download and install it.
- Restart your computer after installation.
